Why Filter?
An iPhone typically sends one location update per second to the app. If all of
those are retained you’ll end up with tens of thousands of points for a day trip.
That’s not intractable; the app should have no trouble displaying a track with
even millions of points without any problem. But you might have difficulties if you
want to share your track recording with other apps, or upload it to a website.
It will also be difficult to manually edit a track with lots points.
The most significant problem with tracks with excessive points, however, is that
the reported length of such a track is likely to be exaggerated. This is a
particular problem when you are traveling slowly (i.e. walking) or if you are
making frequent stops. Because of this we recommend that you enable filtering
when you record hikes.
More About Exaggerated Lengths
There are a few reasons why excessive points can result in excessive reported
track lengths, and also climb.
Low-accuracy Points
Firstly, the track may include low-accuracy points that are some distance from
your true location. This is a consequence of the multiple sources of location
data available to a phone, including accurate GPS satellite data and much less
accurate data based on cell towers. If there’s one such cell tower data point
in the middle of a sequence of GPS points, your track will get an excursion
that could be enormous.
Jitter
Secondly, the natural jitter in GPS locations can add a lot to a track length
when you are moving slowly, or stationary. Consider the case where the GPS
points have an accuracy of ± 2 feet, and you’re moving at 5 feet
per second:
Here the straight black line is your true path and the black spots are your
true locations each second, 5 feet apart. The blue circles are the 2-foot accuracy
bounds for the GPS, and the blue spots are your locations as reported by
the GPS, offset from your true location in a random direction. So the blue
line is your recorded track, and it’s about 10% longer than your true track
in this case.
The worst case of this effect is when you’re not moving at all. Experimentally,
I see false path length accumulating at a rate of about 300 feet per hour in
this case. That’s outside; if you stop and go inside a building where the GPS
signal strength is lower, the error will be greater.
In contrast, if you’re moving faster - even cycling, for example - this effect
is much less significant.
Fractal Paths
(Note that the example below is from UK Map,
not Topo Maps 2.)
A third effect is the fractal nature of tracks: you may really have hiked
further than measuring the route on a map would suggest. Consider this map,
where the steep path is shown by the dashed black line, and the recorded track
is in red:

Clearly the recorded track is much longer than the mapped path, but is this
entirely due to GPS jitter? A look at air imagery gives a clue:

With sufficiently-detailed imagery, you can see that the recorded track
is better-aligned with the actual path on the ground than the mapped path is.
This isn’t because the map is wrong per se; rather, the curvature of the path
exceeds the limit of detail that a map of this scale can show.
Mathematically, features like this where the size varies as the level of detail
changes are called fractals. In cartography, the textbook example is the length
of the coastline of Britain; see for example
this animation and
Wikipedia. Importantly,
the length of a fractal does not converge to a stable value as the level of detail
increases, but continues to grow.
What length do we want to report in this case? That depends what you want
to do with the numbers that you get. One possibility is that you want the same
answer that you would have obtained if you’d measured the route using a piece of
string on a paper map.
Filtering After Recording
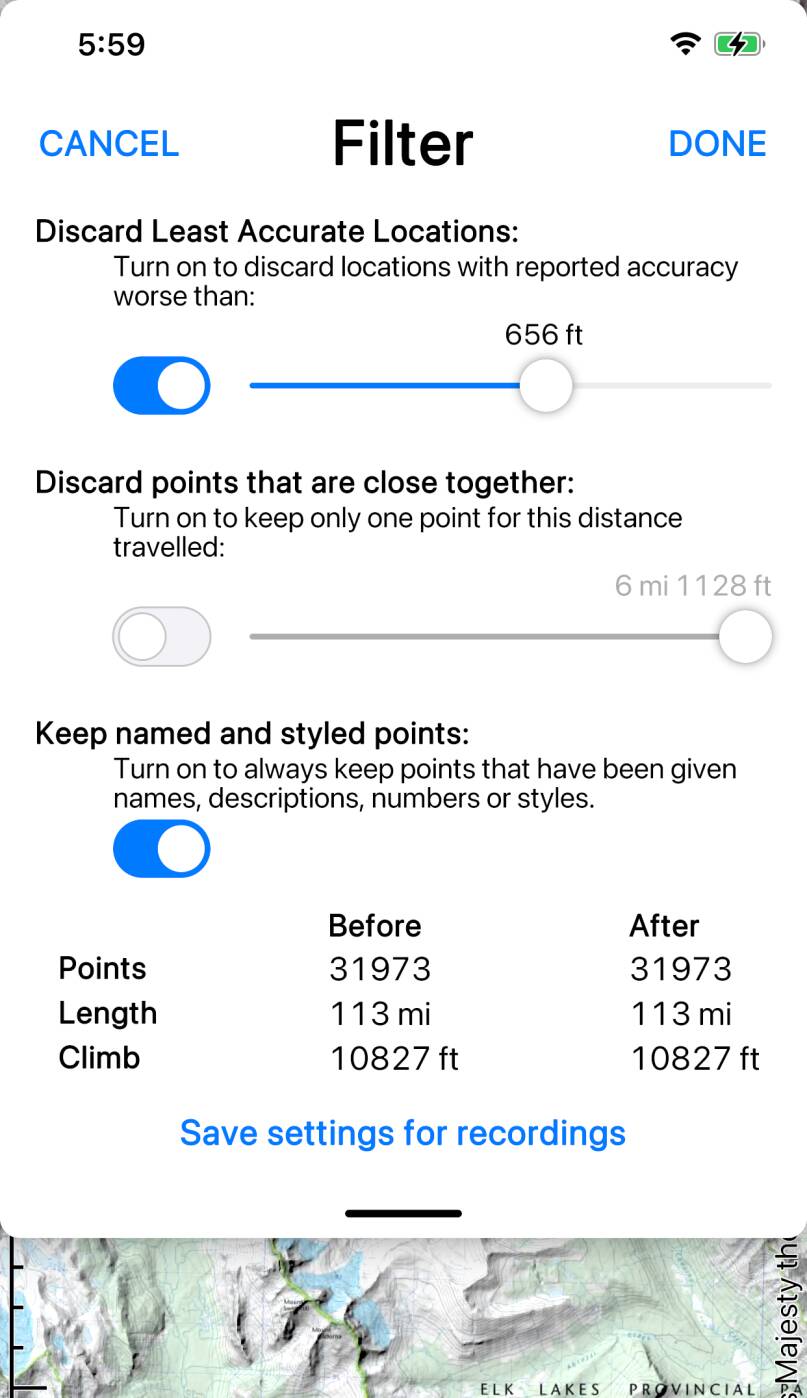
To filter a track that you have previously recorded, tap on the track, tap
, and then tap .
The filtering form will be shown.

There are several types of filtering that you can apply:
- Discard Least Accurate Locations: Turn this on and adjust the slider to filter out points whose accuracy, as reported by the hardware, is worse than this threshold. Moving the slider to the left removes more points. Use this to address the first issue described above.
- Discard points that are close together: Turn this on and adjust the slider to filter out points that are closer together than this threshold. Moving the slider to the right removes more points. Use this to address the second and third issues described above.
- Discard points with no speed: (Not shown in the screenshots). Turn this on and points that don’t include a speed value will be filtered out. Generally, accurate points from the GPS will include speed; less accurate points from other location sources will not. Turning this on will improve graphs of speed.
- Discard points with no elevation: (Not shown in the screenshots). Turn this on and points that don’t include an elevation value will be filtered out. Generally, accurate points from the GPS will include elevation; less accurate points from other location sources will not. Turning this on will improve graphs of elevation.
The final switch, Keep named and styled points, should be turned on to ensure that any
points you added using the button are not removed
even if they meet the criteria of the two filters.
With reference to the Wikipedia page linked above, you can consider the value of the second
slider to be the length of the yardstick used to make the measurement. To get a length that
will be similar to measuring with a piece of string on a paper 1:24,000 map, a value of perhaps
1/10 inch x 24,000 = 200 feet might be appropriate.
Adjusting these sliders updates the track in real time, so you can see the effect of your changes.
At the bottom of the filtering form, statistics are shown giving the number of points, length and
total climb for the track before and after filtering with the current settings. So you could, for
example, say “I know that hike was 10 miles” and adjust the sliders until it agrees with you.
(That may or may not be a reasonable thing to do!).
In the video, note how the displayed track initially changes relatively little yet the number of
points drops considerably. Only as the slider gets to the right does the appearance of the track
(at this zoomed-out view) change significantly.
When you tap the modified track is saved. Note that at this point
the filtering cannot be un-done. Examine the track and be sure you are happy with the results
first. will revert the track to its un-filtered state.
The advantage of filtering after recording is that you can experiment in this way to get the
effect that you want. The disadvantage is that during your trip the reported distance will be
exaggerated. The alternative is to filter while recording.
Filtering While Recording
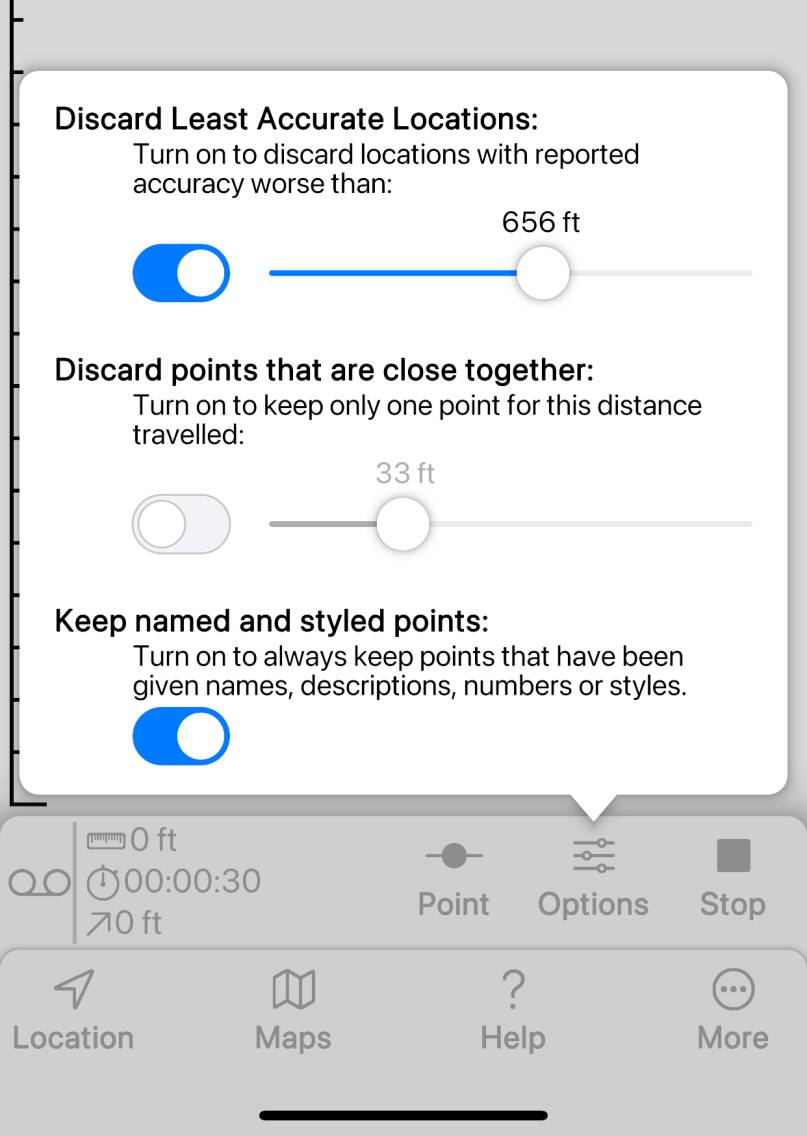
After you start recording, tap the button to
present the filtering-while-recording form.

Note that this has the same controls as the
filtering form described above. The filter criteria that you select here will be applied
to locations as they are received from the hardware. Note this means that you cannot
retrospectively adjust the sliders to get more points - you can’t restore points that
were never recorded.
Note the button in the filtering form.
Tap this to apply the settings from that form to the filtering-while-recording form; this
allows you to find values that work for you interactively, and use them for subsequent
track recordings.


